

Your own device
For an ESP32, ESP8266, Raspberry Pi, MicroPython board, a PLC with a gateway, or any program that can send HTTP or MQTT. You can try it on the free Community plan.
A 30-second video: from Add Device to the first reading.
1. Create the device
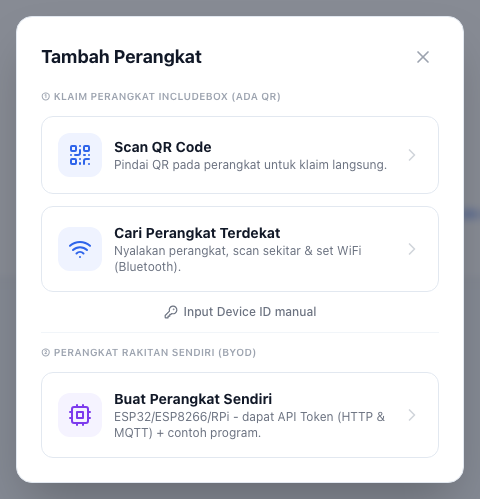
Open Devices, then Add Device.
Choose Buat Perangkat Sendiri (create your own device).
Fill in Nama perangkat (device name), for example
Warehouse sensor. Leave Jenis (type) at Custom / lainnya if nothing else fits.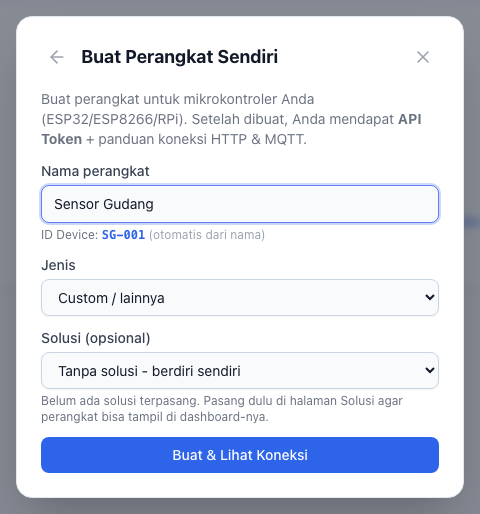
Press Buat & Lihat Koneksi (create and show connection).
The Koneksi & Integrasi (connection) screen opens:
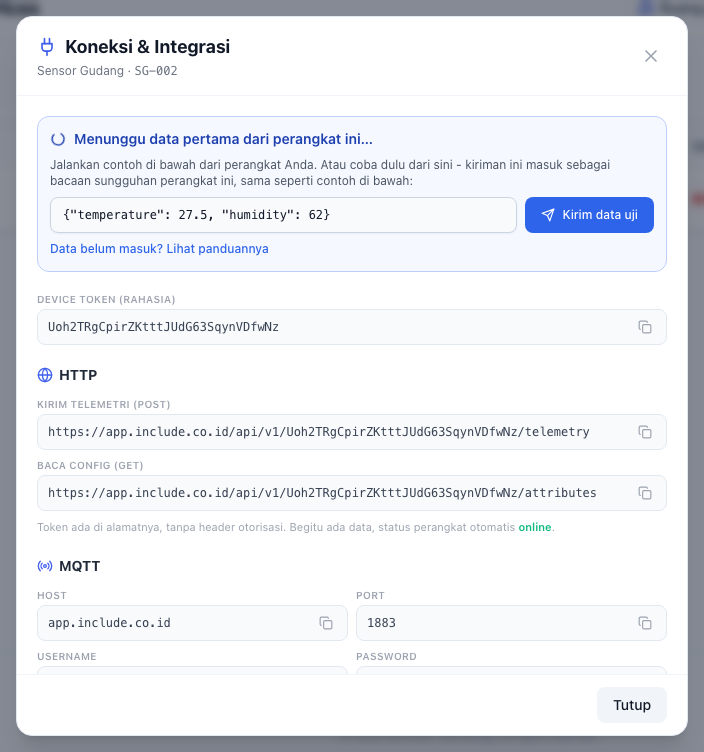
- Device Token: this device's secret key. Whoever holds it can send data as this device, so do not upload it to a public repository.
- This device's HTTP address and MQTT settings.
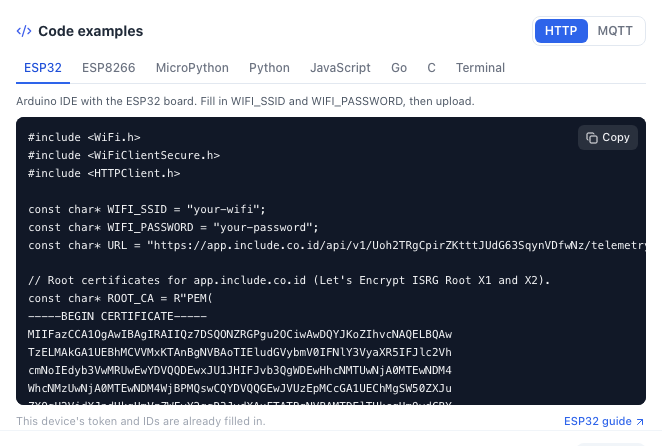
- Code examples: complete programs for each board and language, with this device's token and IDs already filled in.
You can reopen this screen any time: open the device, the Pengaturan (settings) tab, then Koneksi & Integrasi.
2. Pick the guide for your device
| Your device | Guide |
|---|---|
| ESP32 with the Arduino IDE | ESP32 |
| NodeMCU, Wemos D1 mini, other ESP8266 | ESP8266 |
| ESP32 or Raspberry Pi Pico W with MicroPython | MicroPython |
| Raspberry Pi, Orange Pi, Linux gateway | Raspberry Pi |
| A program on a PC or server (Python, JavaScript, Go, C) | Computers, servers and gateways |
| Just trying it from a terminal | Code examples, curl tab |
Every guide uses the same code as the Code examples section, and all of it is tested against a copy of the platform before it is published.
3. Make sure the data arrives
Keep the Koneksi & Integrasi screen open. Menunggu data pertama dari perangkat ini… (waiting for the first data) changes to Data pertama masuk! (first data received) as soon as the first reading arrives.
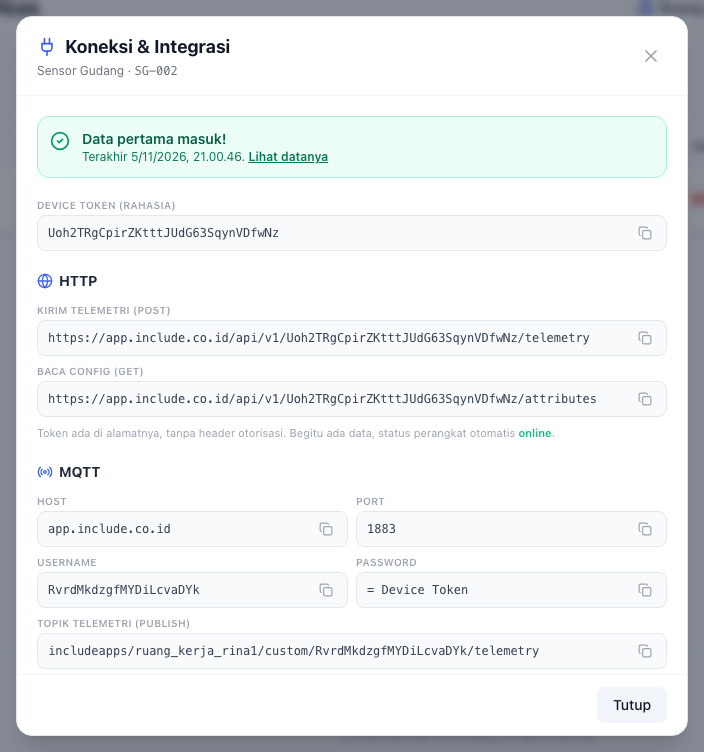
Want to check the platform side before touching the device? Press Kirim data uji (send test data). You can edit what it sends, and it arrives as a real reading of this device.
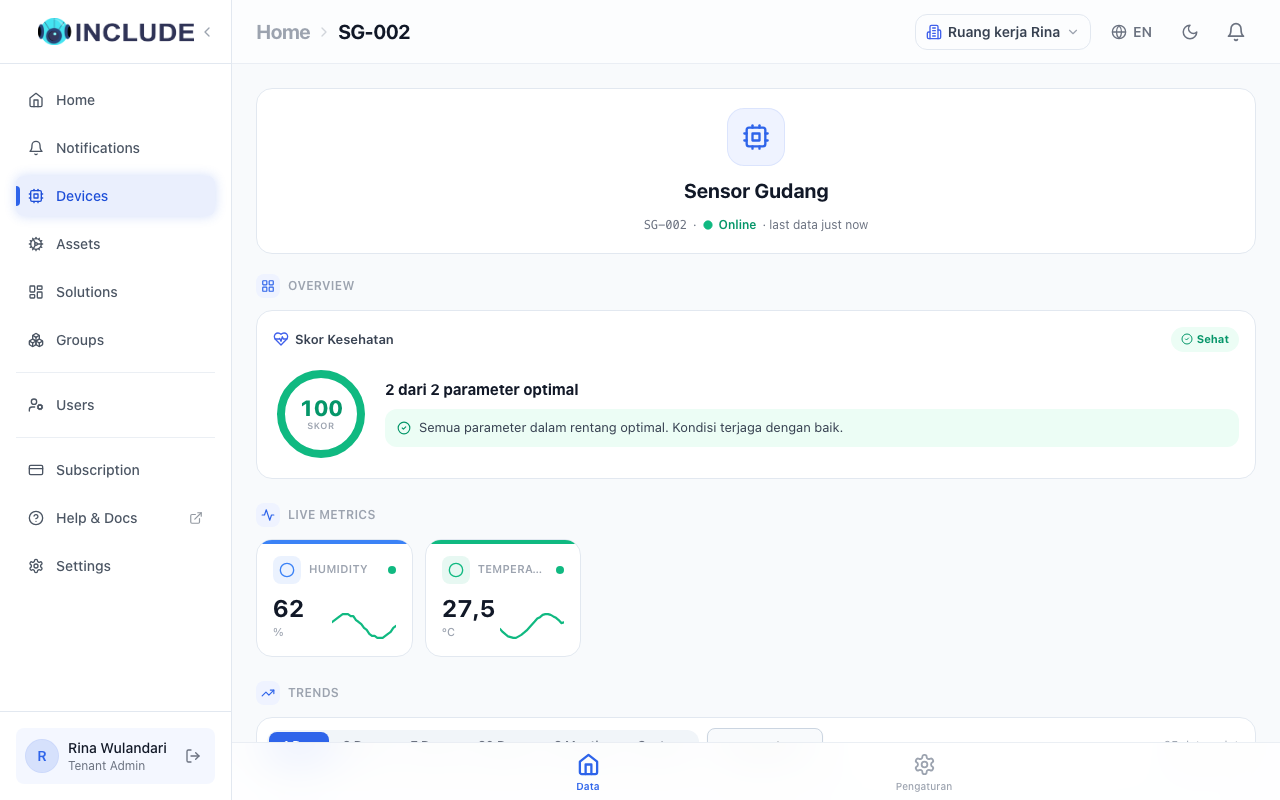
After that the reading shows on the device page:
HTTP or MQTT?
| HTTP | MQTT | |
|---|---|---|
| How it works | One request per reading | One open connection, many messages |
| Best for | Sending every 10 seconds or less often | Sending often, or receiving commands |
| What the device needs | Device Token | Device ID, Device Token and the topic |
| Port | 443 (HTTPS) | 1883, or 8883 with TLS |
If unsure, start with HTTP. Details: Sending data over HTTP and Sending data over MQTT.